Gioia Wall Art

Assorted Green Leaves Wallpaper

$9.99 AUD

The sample is limited to a maximum of one per design per customer. If you place an order after getting a sample, we will credit the cost of the sample back to you. Please contact us before or after your placing wallpaper order.

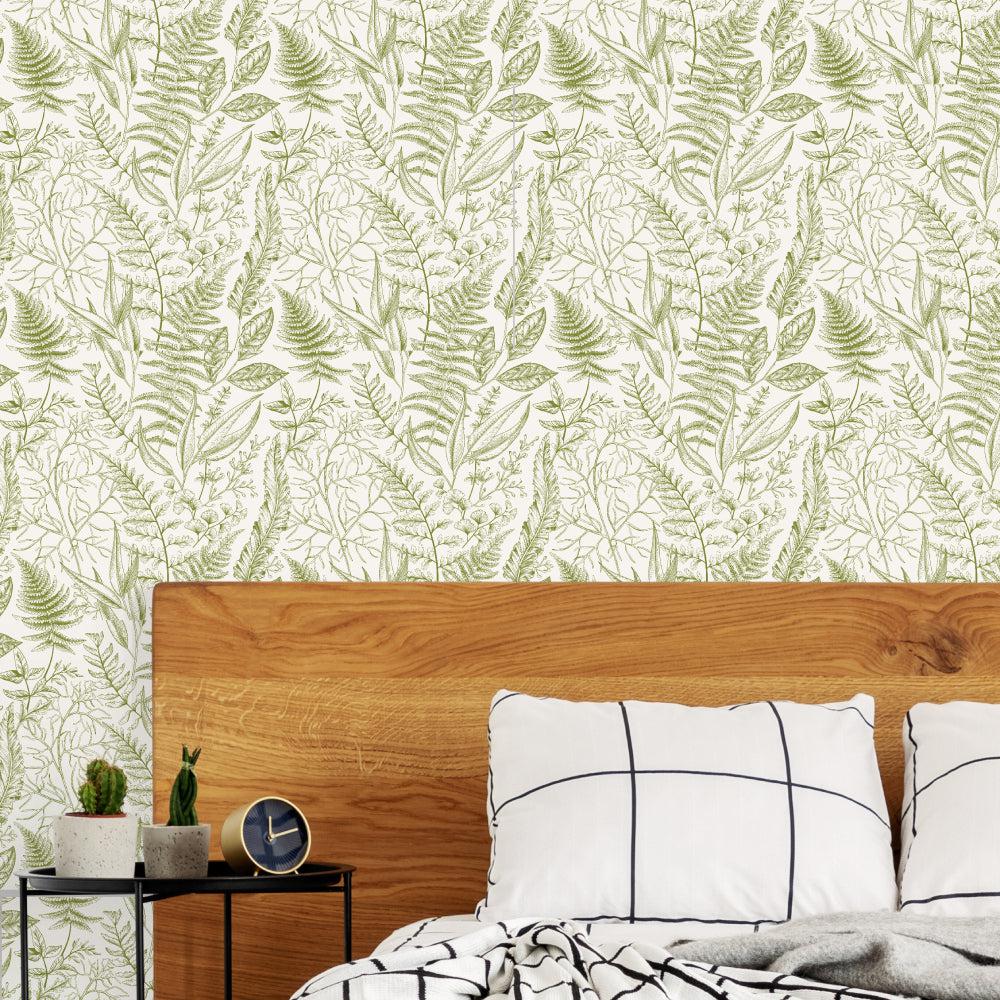
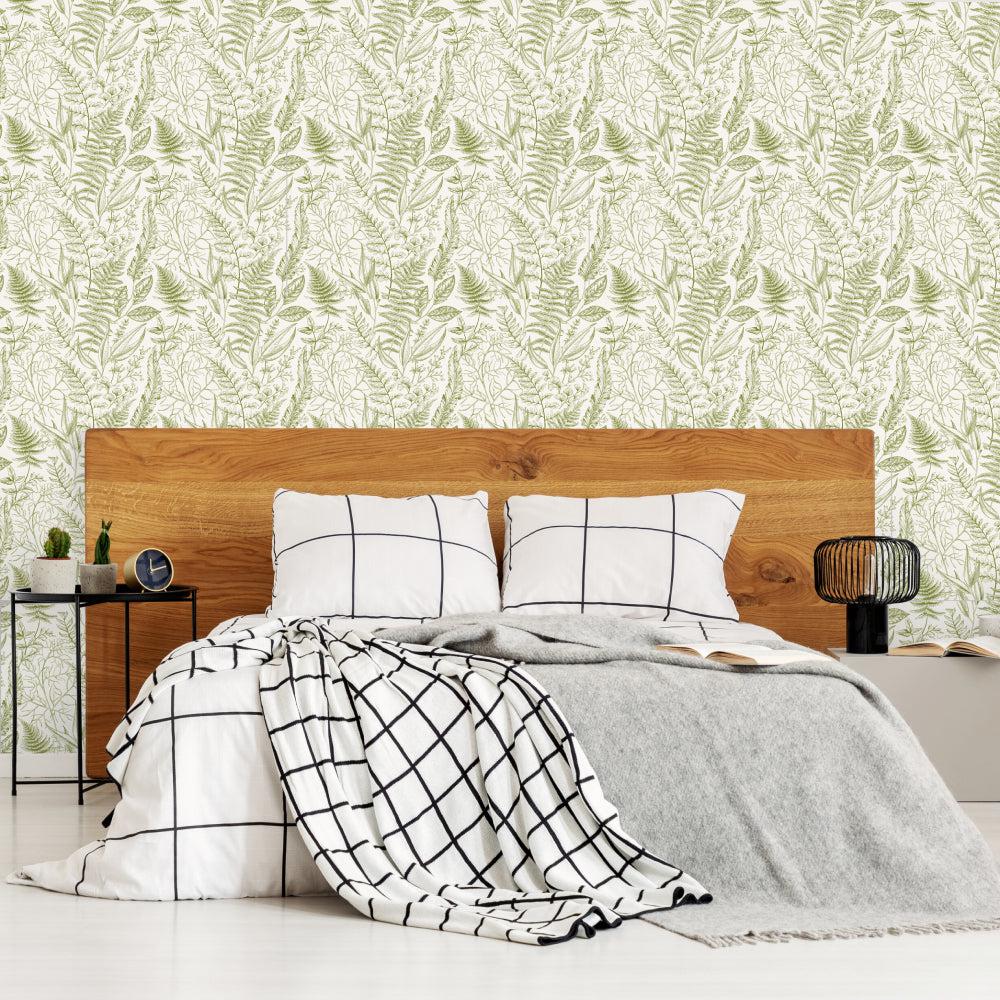
  • Peel & Stick. Easy application and clean removal. Suitable for both renters and homeowners. 
  • DIY-friendly, can be easily installed, no pastel is required. No mess, no fuss
  • Measure the wall and choose the closet but bigger size.
  • Supplied in 61cm wide panels - 60cm wallpaper plus 1cm overlap, numbered for convenience, rolled up in a sturdy tube.
  • Eco-friendly. The wallpaper fiber has a matt finish, is nontextured, nonwoven, and is 100% PVC-free. 
  • Printed with ECOLOGO® Certified and GREENGUARD GOLD Certified HP Latex printer. No nasty odour, no drama.

Click here for the full installation guide. 

Our wallpaper comes in Peel & Stick and Spray &Up options. Both options are

  • Easy application and clean removal. Suitable for both renters and homeowners.
  • DIY-friendly, can be easily installed, no pastel is required. No mess, no fuss
  • Supplied in 61cm wide panels - 60cm wallpaper plus 1cm overlap, numbered for your to install. Rolled up in a sturdy tube with an installation guide.
  • Eco-friendly. The wallpaper fiber has a matt finish, is nontextured, nonwoven and is 100% PVC free. 
  • Printed with ECOLOGO® Certified and GREENGUARD GOLD Certified HP Latex printer. No nasty odd, no drama.
Please find more details for each type as below.

All the items are made-to-order in Melbourne. Your wallpaper and decal will be rolled up in a mailing tube. If you order a large size of wallpaper, they may come in more than one tubes. You will receive a notification email with tracking information when your order is on its way to you.  

Production Time

Normally your order will be dispatched within 3 business days

Shipping

  How long it will take after dispatch?

FREE

Standard Shipping

3-5 business days for metro areas. 5-10 business days for orders to WA & NT & TAS and rural areas. 

Express Shipping

1-4 business days, depending on where you are. 

There will be extra cost calculated at checkout.

Local Pickup

Pick up from our workshop in Blackburn North VIC 3130.

We will email you when your order is ready. Then you can come over anytime during 9am-5pm Mon.-Fri. except public holidays.


If you have any questions, please feel free to contact us anytime.

This wall paper is self-adhesive backed. The adhesive is designed for easy application and clean removal.

Prepare Your Wall

The wall surface should be clean, dry, structurally sound and free of mildew, grease, or other stains, and free of irregularities in order to achieve the best results.This will also ensure clean complete removal when redecorating.

To apply on drywall.

For best results, apply to a wall surface that has been painted with one coat of builder’s primer and one coat of water based paint (note: this is typical of new construction; a wall surface that has been painted with a single coat of primer or a coat of satin or gloss paint is acceptable).

The wall surface should be clean, smooth, and free of debris or contaminants.

To apply over paint.

Painted walls should be primed, smooth, and free from debris. Check the wall surface to determine the condition of the paint adhesion. If the paint is old, damaged, or flaking, priming is highly recommended.

To apply to a wall previously covered with wall paper.

Any old wall paper remaining should be removed as well as the old adhesive (remove by sanding or using adhesive remover). Primer should be applied to the wall surface that is clean, smooth, and free of the old adhesive. 

To apply over paneling.

Any grooves should be filled to achieve a smooth surface, then covered with an adhesion-promoting primer.

Application

  • Equipment – a step ladder, a sharp knife, a spirit level, and maybe a second pair of hands. Make sure your hands are clean and dry. Inspect your wall and remove any picture hooks and any switch plates.
  • To remove the wallpaper from the tube (it can be tight), grab the corners from the inside the roll and, with the roll turned on it’s side, twist the panels until you feel movement – this should allow enough space to pull the panels out.
  • Start From the Left – start hanging panels on the left side of the wall, either according to the number written on the back, or just one by one. Take your time on this first panel, making sure it is level at the top. If the wall is adjoining another wall, you may need to slightly overhang Panel 1 on the left side and trim later, if the wall is not perfectly square.
  • Prepare To Stick –  lay the panel face down on a flat surface (somewhere clean) and peel back about 30cm of backing paper and fold it back sharply (so it stays out of the way). Do not let any debris stick to the adhesive.
  • Stick – line up the top edge of the wallpaper with the top of the wall and then stick it to the wall. If it is not square, peel it off and reapply.
  • Remove The Backing Paper – once in place, stick it to the wall. Carefully pull the backing paper down from behind the panel in stages, in a slow and even fashion. Let the wallpaper fall naturally into place, smoothing it to the wall with your hand in a down and outwards motion to remove any bubbles.
  • Wrinkles and Bubbles – all bubbles should just smooth out. If they don’t or a crease occurs, just peel up the panel and reapply rather than rubbing the print.
  • Additional Panels – align the next panel to the first panel, and remove the backing paper and stick to the wall as per the previous instructions.
  • If the design is not lining up, once the backing paper is removed from the panel, pull it away from the wall, drop it down 10cm from the top of the wall, align at eye level, smooth it onto the wall from the centre back to the top and to the bottom. Just keep the back of the panel from adhering to itself.
  • Trimming – when all the panels have been adhered, use a sharp knife to remove any excess at the base of the wall. Carefully trim around the power points and light switches after pulling the plate off if necessary.
Our Spray and Up wallpaper is made to wet-Iaid material, requiring no adhesive, only water for application.

    Prepare the wall

    Wall needs to be sealed and smooth. The wall surface should be clean, dry and free of debris. Priming is always recommended for best results at all times and especially with old, damaged, or flaking paint, and on a wall with uneven surfaces.

    Spray the Wall

    • Standard spray bottle can be used
    • Fill spray bottle with tap water
    • Turn nozzle spray to coarse spray function to allow high water flow
    • Recommend water to be applied at rate of 100ml per 1 sqm, starting at the top of the wall and moving downwards
    • Check that surface of the wall is visibly saturated with water
    • If not, apply more water using spray bottlespray and up wall paper

      Application

      • Hang Spray and Up wallpaper panel dry straight from the roll.
      • Material can be re-positioned and re-alligned during first 10 minutes
      • If material does not move easily during repositioning, lift up material and apply more water to wall
      • Smooth the length onto the wall using your hand or a paperhanger’s brush, to remove any bubbles or wrinkles
      • Trim at top and bottom, using a sharp knife, for perfect finish.

      Finishing

      • Moisten the cloth and wring out excess water. Change rinse water frequently.

      Product Removal

      When it’s time for a change, product can be easily removed from the wall in one piece when mounted to surfaces as defined above.

      In case your wall was not well prepared, you may not achieve one piece removal. Use a bucket of water and a sponge, thoroughly wet the wall mural, starting from the top. Keeping the mural wet, you will be able to slowly peel it from the wall and recover a clean wall. Make sure you constantly keep the mural wet.

      Recently viewed

      You may also like